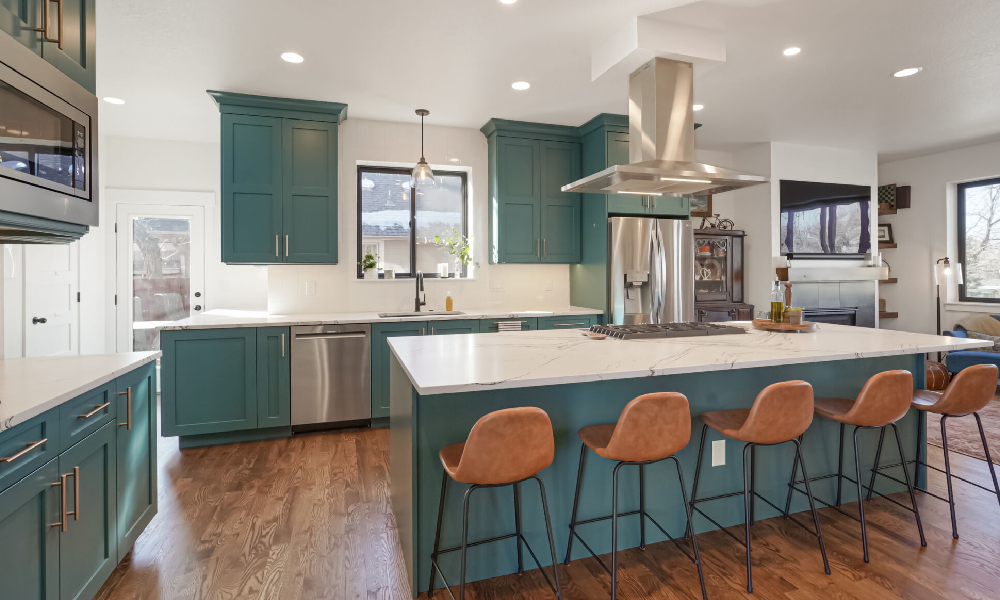
Painting kitchen cabinets is one of the most affordable and effective ways to transform your kitchen without a full renovation. Old cabinets can make a kitchen look outdated, dark, or worn out, but a fresh coat of paint can instantly brighten the space and give it a modern appearance.
Many homeowners think painting cabinets is difficult, but with proper preparation, the right tools, and patience, it can become a manageable DIY project. Whether you want a classic white kitchen, a bold modern look, or a cozy farmhouse style, painting cabinets can dramatically improve the overall design of your kitchen.
In this guide, you will learn how to paint kitchen cabinets properly from start to finish while achieving smooth and professional-looking results.
Why Paint Kitchen Cabinets?
Replacing kitchen cabinets can be very expensive, but painting them offers a budget-friendly alternative.
Painting kitchen cabinets helps:
- Refresh the kitchen appearance
- Modernize outdated cabinets
- Increase home value
- Cover scratches and stains
- Customize kitchen colors
- Save money compared to replacement
A well-painted cabinet system can completely change the atmosphere of your kitchen.
Step 1: Choose the Right Cabinet Paint
Choosing the correct paint is extremely important for durability and appearance.
Best Types of Paint for Cabinets
Acrylic Latex Paint
Popular for easy cleaning and low odor.
Oil-Based Paint
Provides a smooth finish but takes longer to dry.
Alkyd Paint
Combines durability with easier cleanup.
Best Paint Finishes
- Satin finish
- Semi-gloss finish
- Gloss finish
Semi-gloss is one of the most common choices because it is durable and easy to clean.
Choose high-quality cabinet paint for long-lasting results.
Step 2: Remove Cabinet Doors and Hardware
Before painting, remove:
- Cabinet doors
- Drawer fronts
- Handles
- Knobs
- Hinges
Label each door carefully so reinstallation becomes easier later.
Store screws and hardware in small containers or labeled bags.
Removing the doors allows for smoother and more even paint coverage.
Step 3: Clean the Cabinets Thoroughly
Kitchen cabinets often contain grease and dirt buildup that can prevent paint from sticking properly.
How to Clean Cabinets Before Painting
Use:
- Warm water
- Dish soap
- Degreaser
Focus especially on areas near the stove where grease buildup is strongest.
After cleaning:
- Rinse surfaces lightly
- Allow cabinets to dry completely
Painting over grease can lead to peeling and uneven finishes.
Step 4: Sand the Cabinet Surfaces
Sanding helps paint adhere properly and creates a smoother finish.
Use medium-grit sandpaper to lightly sand:
- Cabinet doors
- Drawer fronts
- Cabinet frames
You do not need to remove all existing paint completely. The goal is to roughen the surface slightly.
After Sanding
- Wipe away dust
- Use a tack cloth if possible
Dust left behind can ruin the paint finish.
Proper sanding is one of the most important steps in cabinet painting.
Step 5: Apply Primer
Primer creates a strong surface for paint and improves durability.
Why Primer Is Important
Primer helps:
- Cover stains
- Block old colors
- Improve paint adhesion
- Prevent peeling
Use a high-quality bonding primer designed for cabinets.
How to Apply Primer
Use:
- Foam rollers for smooth surfaces
- Angled brushes for corners and edges
Apply thin and even coats.
Allow the primer to dry fully before painting.
Step 6: Paint the Kitchen Cabinets
Once the primer is dry, you can begin painting.
Best Painting Tools
- Foam rollers
- High-quality paintbrushes
- Paint sprayers (optional)
Apply Thin Coats
Thin coats produce smoother and more professional results than thick coats.
Usually, 2–3 coats are needed for full coverage.
Painting Tips
- Paint in the direction of the wood grain
- Avoid overloading the brush
- Let each coat dry fully before adding another
Patience during this step helps prevent streaks and uneven textures.
Step 7: Allow Cabinets to Dry and Cure Properly
Drying and curing are not the same thing.
Drying Time
Paint may feel dry within hours.
Curing Time
Full curing can take several days or even weeks depending on the paint type.
Avoid heavy use of cabinets during the curing period.
Proper curing improves durability and prevents scratches or peeling.
Step 8: Reattach Doors and Hardware
Once the paint has fully dried, reinstall:
- Cabinet doors
- Drawer fronts
- Handles
- Hinges
Check door alignment carefully during reinstallation.
Upgrade Hardware for a Fresh Look
New handles and knobs can make painted cabinets look even more modern.
Popular finishes include:
- Matte black
- Brushed nickel
- Gold
- Bronze
Small hardware upgrades can dramatically improve cabinet appearance.
Best Colors for Painted Kitchen Cabinets
Choosing the right cabinet color can transform your kitchen style.
Popular Cabinet Colors
White
Bright, clean, and timeless.
Gray
Modern and versatile.
Navy Blue
Bold and elegant.
Sage Green
Soft and natural.
Black
Stylish and dramatic.
Lighter colors usually make kitchens feel larger and brighter.
Common Mistakes to Avoid
Many DIY cabinet painting projects fail because of skipped preparation steps.
Avoid these mistakes:
- Not cleaning cabinets properly
- Skipping sanding
- Applying thick paint coats
- Rushing drying times
- Using low-quality paint
- Forgetting primer
Careful preparation leads to much better results.
How Long Does It Take to Paint Kitchen Cabinets?
The timeline depends on kitchen size and drying conditions.
Typical Timeline
- Preparation: 1–2 days
- Priming: 1 day
- Painting: 1–2 days
- Drying and curing: Several days
Taking your time usually produces more professional-looking cabinets.
Best Tools for Painting Kitchen Cabinets
Helpful tools include:
- Screwdrivers
- Sandpaper
- Tack cloths
- Foam rollers
- Paintbrushes
- Painter’s tape
- Drop cloths
- Paint trays
Using proper tools makes the painting process easier and cleaner.
Final Thoughts
Painting kitchen cabinets is one of the best ways to refresh your kitchen without spending a fortune on a full remodel. With proper preparation, quality materials, and patience, you can achieve beautiful and durable results that completely transform your space.
The key to successful cabinet painting is taking time with each step, especially cleaning, sanding, priming, and allowing proper drying time. Rushing the process often leads to uneven finishes and paint problems later.
Whether you prefer a modern, classic, or farmhouse kitchen design, freshly painted cabinets can instantly improve the look and feel of your home. Start with careful planning, follow the steps patiently, and enjoy the satisfaction of giving your kitchen a completely new appearance.
- Dedicated and performance-focused SEO Specialist with professional expertise in Furniture, Kitchen, Leather, Home Interior, and Lifestyle industry SEO.
- Experienced in creating data-driven SEO strategies that improve organic rankings, website authority, lead generation, and long-term business growth.
- Specialized in SEO for:
- Modular Kitchen & Smart Kitchen Solutions
- Kitchen Cabinets & Accessories
- Home, Office & Custom Furniture
- Bedroom, Dining & Living Room Furniture
- Interior Design & Home Décor
- Leather Fashion & Lifestyle Products
- Advanced experience in Leather industry SEO, including:
- Genuine Leather Products
- Leather Bags & Travel Accessories
- Leather Wallets & Card Holders
- Leather Belts & Corporate Accessories
- Handmade Leather Goods
- Leather Jackets & Fashion Items
- Premium & Luxury Leather Collections
- Core SEO expertise includes:
- On-Page SEO Optimization
- Technical SEO Audits
- Off-Page SEO & Link Building
- Keyword Research & Competitor Analysis
- SEO Content Planning
- E-commerce SEO
- Local SEO
- Google Search Console & Analytics Optimization
- Website Structure & User Experience Improvement
- Strong understanding of SEO-friendly product content, category structure, and conversion-focused digital marketing strategies.
- Experienced in optimizing eCommerce and business websites for higher visibility, better user engagement, and sustainable organic traffic growth.
- Ability to combine business strategy, audience research, and modern SEO techniques to build strong digital brand presence.
- Educational Qualifications:
- Graduation in Geography & Environment from Government B. L. College
- MBA in HRM from Sundarban University
- Passionate about continuous learning, search engine algorithm updates, AI-driven SEO trends, and digital business development.
- Believes in ethical SEO practices, professionalism, transparency, and long-term client success.
- Strong communication, leadership, and project management skills with the ability to work on both local and international projects.
- Proud follower of Islam, maintaining values of honesty, discipline, respect, and responsibility in every professional commitment.
- Based in Khulna and actively working in the digital marketing and SEO industry with a vision for sustainable online growth and branding excellence.