Kitchen cabinets are one of the most frequently used parts of any kitchen, yet they are often overlooked during regular cleaning. Over time, grease, dust, food stains, fingerprints, and cooking residue build up on cabinet surfaces, making them look dull and dirty. If not cleaned properly, this buildup can damage the cabinet finish and create unpleasant odors.
The good news is that cleaning how to clean kitchen cabinets, does not have to be difficult or time-consuming. With the right cleaning methods and a consistent routine, you can keep your cabinets looking fresh, shiny, and well-maintained for years.
Whether your cabinets are made of wood, laminate, painted material, or metal, this guide will walk you through the best ways to clean them safely and effectively. Follow these simple steps to restore cleanliness and improve the overall appearance of your kitchen.
Why Cleaning Kitchen Cabinets Is Important
Kitchen cabinets collect more dirt than most people realize. Cooking oils, steam, smoke, and food particles settle on cabinet surfaces daily, especially around the stove area.
Regular cabinet cleaning helps:
- Remove grease and bacteria
- Improve kitchen hygiene
- Extend cabinet lifespan
- Prevent discoloration and stains
- Maintain a fresh kitchen appearance
- Reduce unpleasant odors
Clean cabinets also make the entire kitchen feel brighter and more organized.
Step 1: Empty the Cabinets Completely
Before starting the cleaning process, remove everything from the cabinets.
Take out:
- Plates and bowls
- Food containers
- Spices
- Kitchen tools
- Pantry items
This allows you to clean every corner properly and gives you a chance to declutter unnecessary items.
As you empty the cabinets, check for:
- Expired food
- Broken containers
- Unused kitchen tools
- Crumbs or spills
Discard anything you no longer need.
Removing all items also prevents them from getting wet or damaged during cleaning.
Step 2: Dust and Vacuum the Interior
Once the cabinets are empty, remove loose dirt and dust.
Use:
- A dry microfiber cloth
- A handheld vacuum
- A soft brush attachment
Focus on:
- Corners
- Shelf edges
- Hinges
- Drawer tracks
Dust and crumbs often collect in hidden areas, especially in lower cabinets.
Vacuuming first prevents dirt from turning into muddy residue when mixed with water later.
Avoid using rough brushes that may scratch cabinet surfaces.
Step 3: Prepare a Gentle Cleaning Solution
The right cleaning solution depends on your cabinet material, but mild cleaners are usually safest.
Simple Homemade Cabinet Cleaner
Mix:
- Warm water
- A few drops of dish soap
- White vinegar (optional for grease removal)
This mixture works well for most cabinet types.
Avoid harsh chemicals like:
- Bleach
- Strong ammonia
- Abrasive cleaners
- Steel wool
These can damage paint, wood finish, or laminate surfaces.
For stubborn grease, you can add a small amount of baking soda to create a gentle paste.
Always test any cleaner on a small hidden area first.
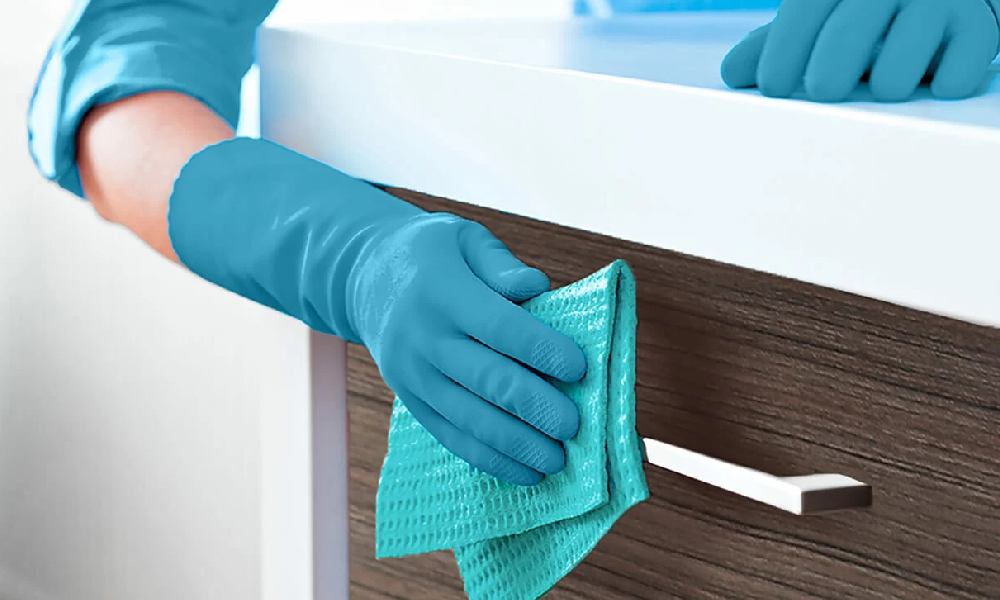
Step 4: Wipe Down Cabinet Surfaces Properly
Dip a soft microfiber cloth into the cleaning solution and wring it out well. The cloth should be damp, not soaking wet.
Clean:
- Cabinet doors
- Handles
- Edges
- Shelves
- Drawer fronts
Use gentle circular motions to lift grease and stains.
Focus on High-Grease Areas
Cabinets near the stove usually collect the most grease. You may need extra attention in these areas.
For sticky grease buildup:
- Apply the cleaning solution
- Let it sit for 1–2 minutes
- Wipe gently with a soft cloth
Do not scrub aggressively, especially on painted or wooden cabinets.
Important Tip
Too much water can damage wood cabinets and cause swelling. Always use minimal moisture.
Step 5: Clean Cabinet Handles and Hardware
Cabinet handles and knobs collect bacteria, fingerprints, and grease daily.
Use a soft cloth or toothbrush to clean around:
- Handles
- Knobs
- Hinges
- Decorative hardware
For metal hardware:
- Use mild soap and water
- Dry immediately to prevent rust or water spots
If the hardware is removable, you can soak it in warm soapy water for deeper cleaning.
Clean hardware improves both hygiene and cabinet appearance.
Step 6: Dry the Cabinets Completely
After cleaning, dry all surfaces immediately using a clean microfiber towel.
Do not allow moisture to remain on:
- Wooden surfaces
- Hinges
- Corners
- Cabinet edges
Excess moisture can lead to:
- Warping
- Peeling paint
- Mold growth
- Wood damage
Pay special attention to cabinet seams and corners where water may collect.
Proper drying is one of the most important parts of cabinet maintenance.
Step 7: Organize and Return Items Carefully
Once the cabinets are fully dry, place items back neatly.
Before returning items:
- Wipe containers clean
- Remove sticky jars
- Organize similar items together
Smart Cabinet Organization Tips
Group items by category:
- Cooking supplies
- Snacks
- Baking ingredients
- Plates and bowls
Store frequently used items at easy-to-reach levels.
You can also use:
- Shelf liners
- Storage bins
- Drawer organizers
- Lazy Susans
A clean and organized cabinet system helps maintain cleanliness longer.
How to Remove Tough Grease from Kitchen Cabinets
Grease buildup is one of the biggest kitchen cabinet problems.
Baking Soda Method
Make a paste using:
- Baking soda
- Small amount of water
Apply it gently to greasy spots and wipe with a soft cloth.
Vinegar Solution
Mix equal parts:
- White vinegar
- Warm water
Spray lightly onto greasy surfaces and wipe clean.
Avoid soaking wooden cabinets with vinegar because too much acidity may damage finishes over time.
Best Cleaning Methods for Different Cabinet Materials
Wooden Cabinets
Use minimal water and gentle soap. Dry immediately after cleaning.
Painted Cabinets
Avoid abrasive scrubbers that may remove paint.
Laminate Cabinets
Laminate surfaces are easier to clean but can scratch easily.
Metal Cabinets
Dry thoroughly to prevent rust and water stains.
Knowing your cabinet material helps prevent accidental damage.
Common Mistakes to Avoid When Cleaning Kitchen Cabinets
Many people unknowingly damage cabinets during cleaning.
Avoid these mistakes:
- Using excessive water
- Scrubbing too hard
- Using bleach or strong chemicals
- Ignoring grease buildup
- Forgetting to dry surfaces
- Using rough sponges or steel wool
Gentle cleaning methods are always safer and more effective for long-term cabinet care.
How Often Should You Clean Kitchen Cabinets?
Cleaning frequency depends on how often you cook.
Recommended Schedule
Daily
Wipe visible spills and fingerprints.
Weekly
Clean cabinet exteriors lightly.
Monthly
Deep clean cabinet doors and handles.
Every 3–6 Months
Empty and deep clean the interior shelves.
Regular maintenance prevents heavy grease buildup and keeps cleaning easier.
Best Tools for Cleaning Kitchen Cabinets
Helpful cleaning tools include:
- Microfiber cloths
- Soft sponges
- Toothbrushes
- Spray bottles
- Handheld vacuum
- Bucket with warm water
Using soft cleaning tools protects cabinet finishes and improves results.
Final Thoughts
Cleaning kitchen cabinets is an essential part of maintaining a fresh, hygienic, and beautiful kitchen. Although grease and dirt build up naturally over time, regular cleaning can keep your cabinets looking new and extend their lifespan significantly.
By following simple steps like emptying cabinets, removing dust, using gentle cleaning solutions, wiping surfaces carefully, and drying everything properly, you can clean your kitchen cabinets safely without causing damage.
Consistency is the key. Small weekly cleaning habits can prevent heavy buildup and reduce the need for difficult deep cleaning sessions later. A clean cabinet system also makes your kitchen feel more organized, comfortable, and welcoming.
Start with one cabinet at a time, stay consistent, and your kitchen will remain cleaner and more functional every day.
- Dedicated and performance-focused SEO Specialist with professional expertise in Furniture, Kitchen, Leather, Home Interior, and Lifestyle industry SEO.
- Experienced in creating data-driven SEO strategies that improve organic rankings, website authority, lead generation, and long-term business growth.
- Specialized in SEO for:
- Modular Kitchen & Smart Kitchen Solutions
- Kitchen Cabinets & Accessories
- Home, Office & Custom Furniture
- Bedroom, Dining & Living Room Furniture
- Interior Design & Home Décor
- Leather Fashion & Lifestyle Products
- Advanced experience in Leather industry SEO, including:
- Genuine Leather Products
- Leather Bags & Travel Accessories
- Leather Wallets & Card Holders
- Leather Belts & Corporate Accessories
- Handmade Leather Goods
- Leather Jackets & Fashion Items
- Premium & Luxury Leather Collections
- Core SEO expertise includes:
- On-Page SEO Optimization
- Technical SEO Audits
- Off-Page SEO & Link Building
- Keyword Research & Competitor Analysis
- SEO Content Planning
- E-commerce SEO
- Local SEO
- Google Search Console & Analytics Optimization
- Website Structure & User Experience Improvement
- Strong understanding of SEO-friendly product content, category structure, and conversion-focused digital marketing strategies.
- Experienced in optimizing eCommerce and business websites for higher visibility, better user engagement, and sustainable organic traffic growth.
- Ability to combine business strategy, audience research, and modern SEO techniques to build strong digital brand presence.
- Educational Qualifications:
- Graduation in Geography & Environment from Government B. L. College
- MBA in HRM from Sundarban University
- Passionate about continuous learning, search engine algorithm updates, AI-driven SEO trends, and digital business development.
- Believes in ethical SEO practices, professionalism, transparency, and long-term client success.
- Strong communication, leadership, and project management skills with the ability to work on both local and international projects.
- Proud follower of Islam, maintaining values of honesty, discipline, respect, and responsibility in every professional commitment.
- Based in Khulna and actively working in the digital marketing and SEO industry with a vision for sustainable online growth and branding excellence.